
I met Rava Dosas a little after I got married, and it made me wonder how I had lived so long without it. I have barely ever eaten a regular dosa since. Given the opportunity, I always prefer Rava Dosa. I always assumed it must have been a difficult dish to make (because dosas generally need so much preperation) and didn’t ever bother attempting it. Then one day I did. And since then (after a lot of tweaking of recipes) there has been no looking back. This has become my go to weekend breakfast. Every Friday, this is what I absolutely must eat. Somehow my Friday’s don’t seem complete if I miss out on my Rava Dosa and if that ever happens, I make up on Saturday.
What I love about it more than how much I love it’s tastes and how happy it makes me, is how ridiculously EASY it is. There is absolutely no soaking, grinding, leaving overnight to rise, business. It’s literally a one bowl mix which can be made right when you want to eat it!! What can be better?! The regular dosa is just so.much.work that I can never be bothered with it. Yes, you need to make your side of potatoes and a chutney or two to enjoy the full goodness and joy that rava dosa can unleash, but considering how easy it is to make the dosa, the rest of the sides don’t feel like too much work to put the meal together. Some days I even eat my rava dosa without any potatoes. Of course the potatoes make it yummier, but it’s quite nice with just some chutney on the side.
Admittedly this dosa needs a little extra time on the griddle than a regular rice dosa, but it’s just a couple of minutes really. A couple of extra minutes for such deliciousness when I have saved so much energy with the easy mix feels like fair trade.
Everyone who has tried these at our house have loved them and asked for the recipe. Which goes to show, I am not alone in my rava dosa mad love!! My brother, who can’t be bothered to make it just shows up every time he has a craving – he claims it’s better than any he’s ever eaten at a restaurant! He might be biased, but I’m not complaining of such rave reviews!
But seriously, it’s really really good. Try it out! I mean one bowl! That alone should sell it!
And, recipe stalkers (you know who you are) this one is for you. Enjoy!! Sorry you have had to wait so long, but this post needed pictures!!
Rava Dosa

Serves – 4
Ingredients:
Semolina (Rava) – 1/4 cup
Buttermilk – 1/8 cup (about 2 tbsp)
Nirapara* Rice flour/powder – 3/4 cup
All purpose flour (Maida) – 1 tbsp
Cumin seeds – 3/4 tsp
Black pepper corns – 1/2 tsp
Green chili – 1, finely chopped
Coriander leaves – 1/4 cup
Salt – to taste
Water – 1 1/4 cup
Onion – 1/2, finely chopped (optional)
Oil**
*Tip 1 – I have found that using this particular brand of rice flour is the key to this recipe. I have tried various rice powders and this is the one that works the best to get the tastiest, crispiest dosas.
**Tip 2 – For the dosas, I like to put the oil in a small spray bottle and spray the oil on. It isn’t a requirement, but I prefer it over drizzling oil over the dosa with a teaspoon. I feel I use lesser oil while using the spray and it covers a larger surface of the dosa. It’s a personal choice and I recommend it, but drizzling the oil on also works just as well.
Directions:
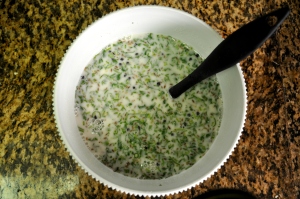
- In a bowl, mix the semolina with the buttermilk and allow to rest for a few minutes (while you mix together the next bowl really!).
- In another bowl, mix together the Nirapara rice flour, all purpose flour, cumin seeds, black pepper corns, green chili, coriander leaves and salt.
- Now add the semolina+buttermilk mix to the above bowl.
- Slowly add the water, mixing as you add, so that there are no lumps formed. Mix well. The dosa mix should be runny.
- Heat a large pan, preferably a heavy bottomed one.
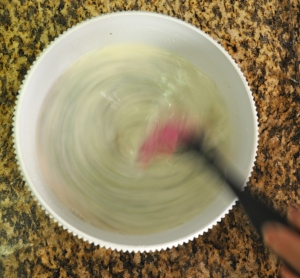
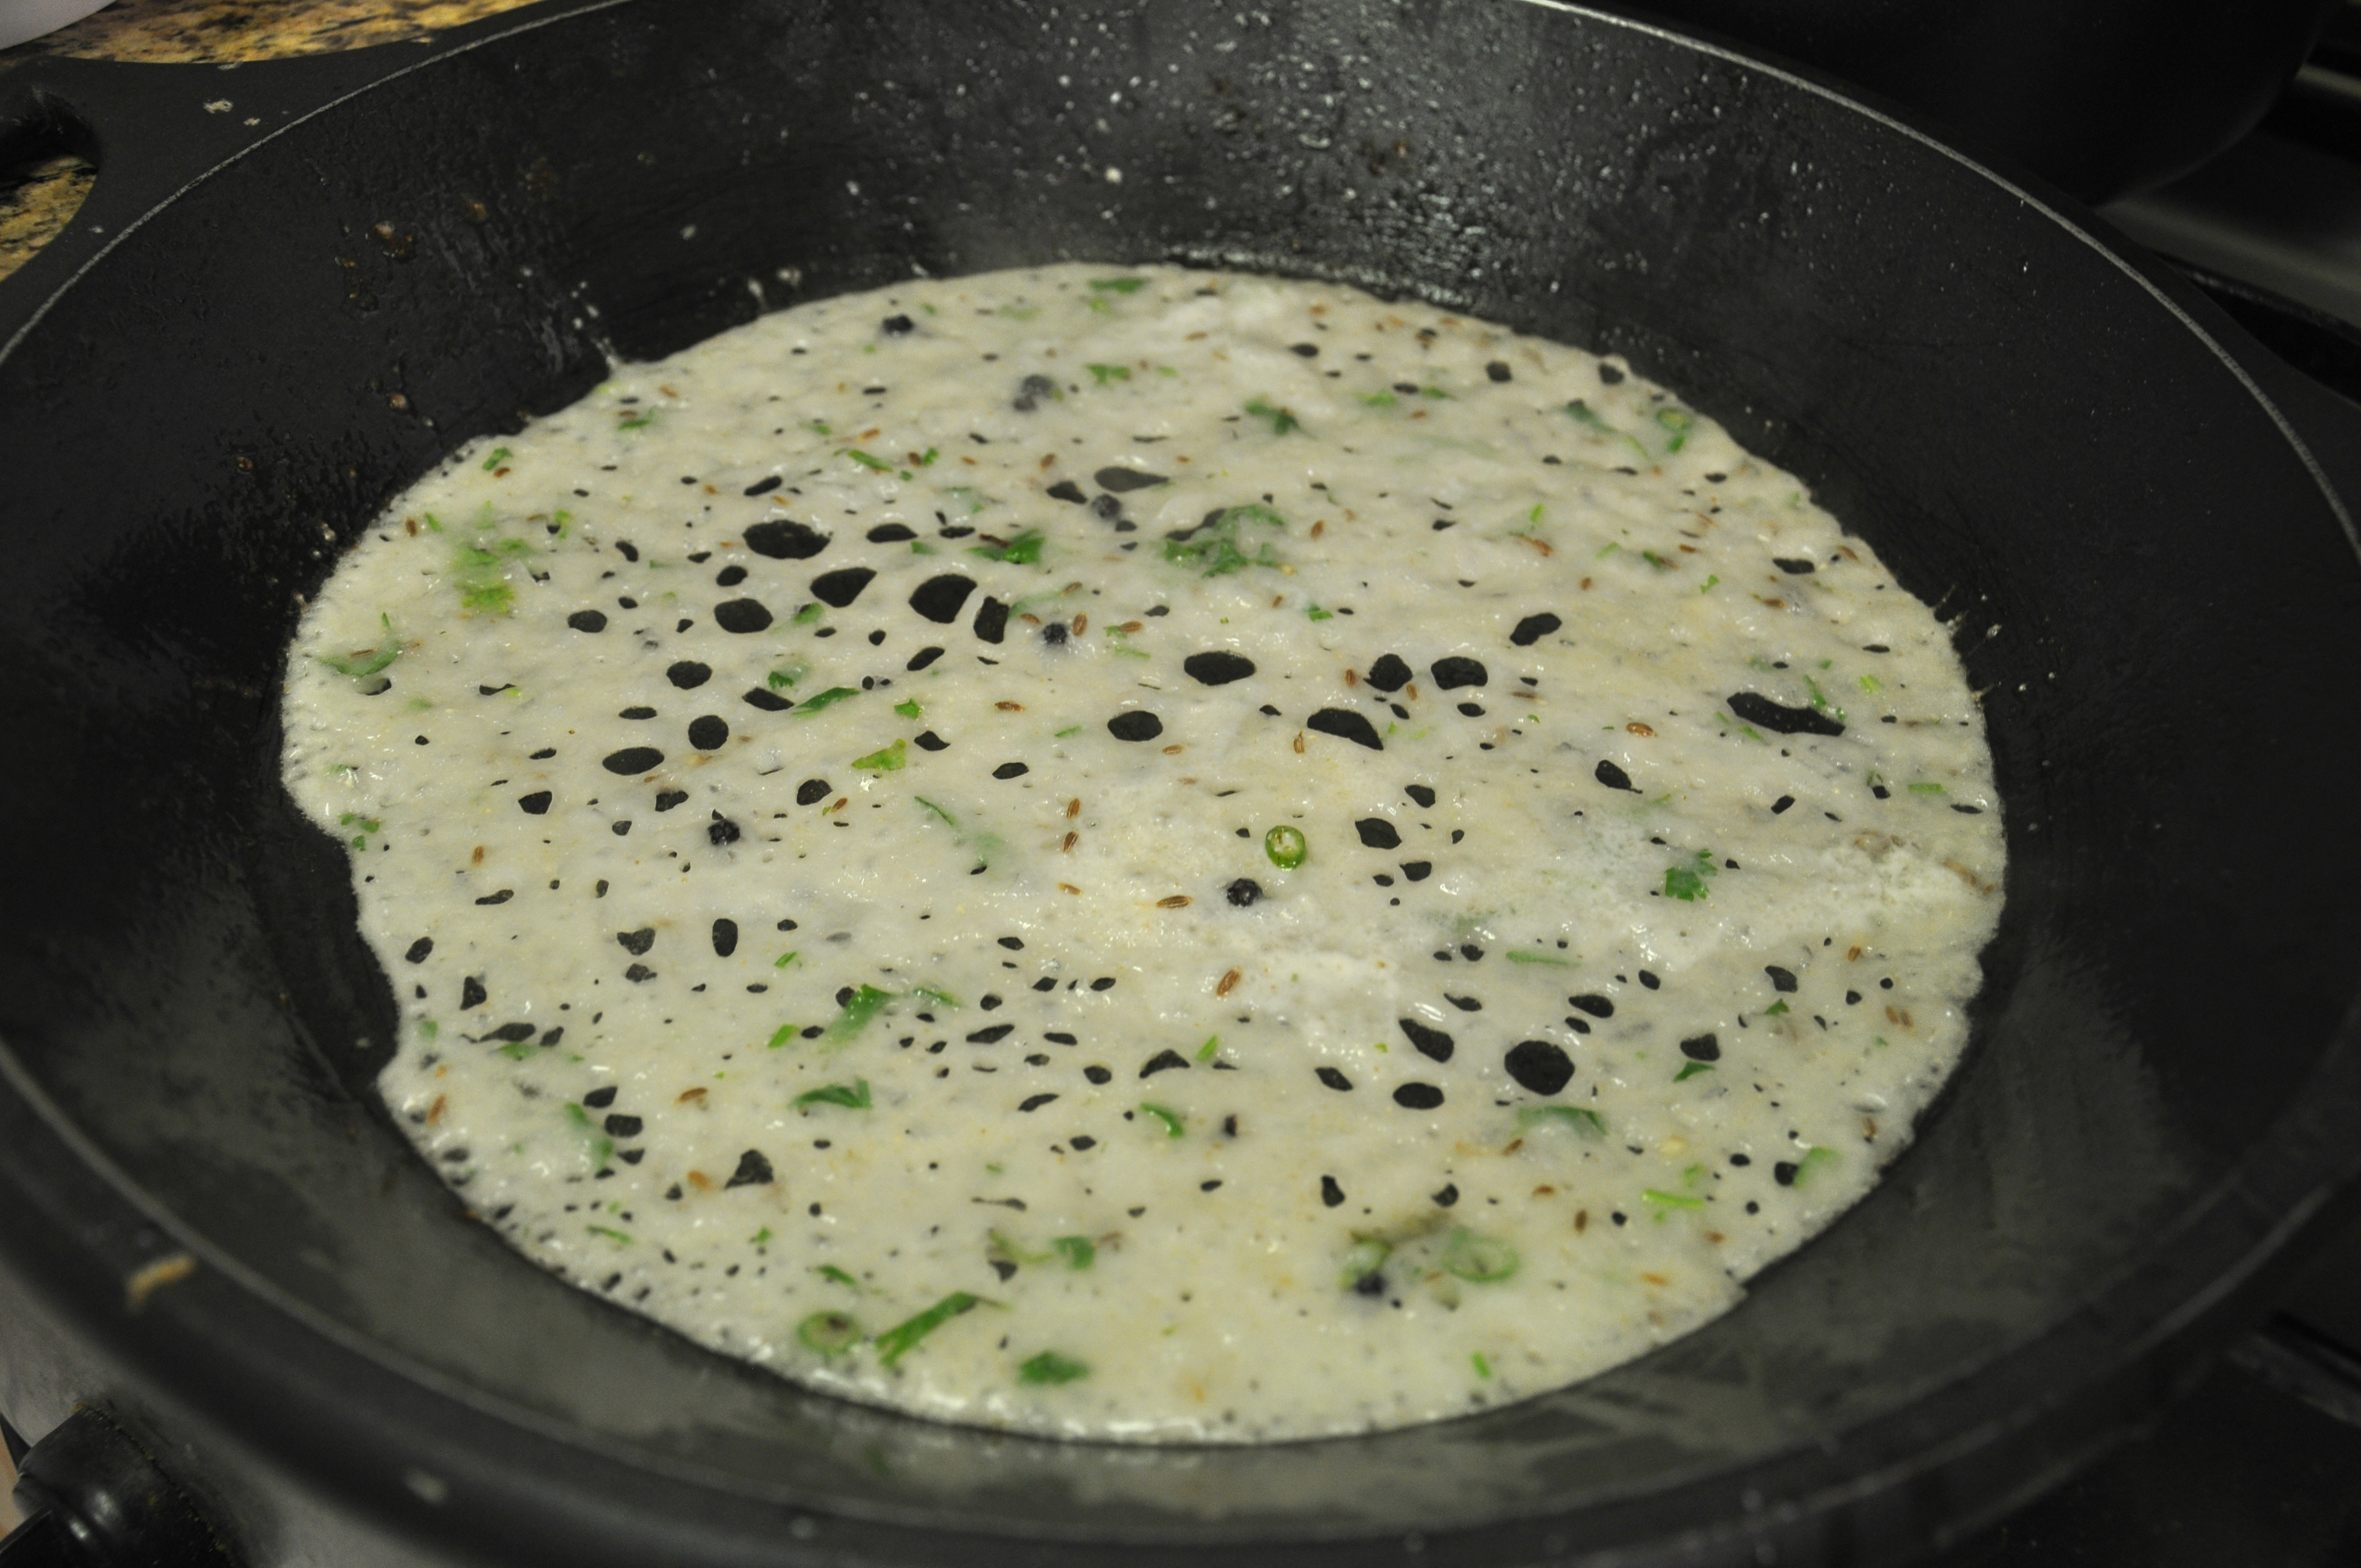
- Using you ladde, stir the dosa mix well. This is very very important. The semolina sinks to the bottom within seconds and you have to make sure you give a quick stir to mix it all up befor you scoop what you need into your laddle. You have to do this every single time you need to pour the mix into the pan.
- Once you’ve given your stir, and your pan is hot, scoop the dosa mix into the ladle and pour into the outer circle of the pan in a circular motion. This doesn’t have to be perfect. Just be sure to pour in a quick motion because the semolina will start to sink in the laddle as well.
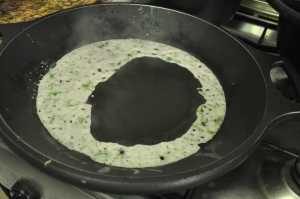
- Give a quick stir to the dosa mix, scoop the mix in your ladle and pour in the pan to fill gap in the center. DO NOT fill in the bubbles that form up. If there are very large holes, you may fill them up, but don’t fill in the bubbles, this is what makes the dosa crisp.
- If you are adding onions, sprinkle the chopped onions over now. (I haven’t used onions in the dosa being made in the pictures. But I usually do and it tastes quite lovely. And that’s what’s called an Onion Rava Masala Dosa btw!)
- Spray/drizzle oil over the dosa.
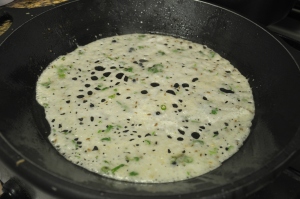
- Now wait.This takes a about 3-5 minutes of minutes. Really. What you want is to see the golden browning inside of the bubbles.
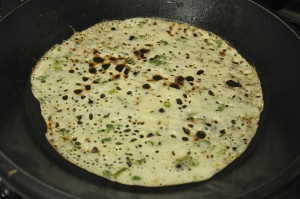
- By now, the dosa is pretty much ready to release itself. The corners should be fairly easy to release with a spatula. You can choose to serve the dosa as is, but I like to add an extra step and flip it over to get a tad bit of crispiness on the inside.
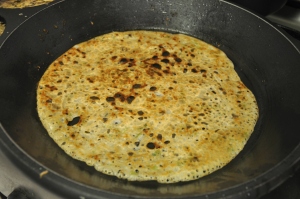
- After a minute or so, flip over again, fold in half on the pan and serve.


And that’s it. God I am hungry just typing this out.
I haven’t gotten down to posting the potato masala and chutneys pictured above, but one of the chutney’s that can go well is the Coconut Chili Chuney.
Much love,
Anjum
(Click my name to see all my recipe posts!)


